What is a Letterhead Template?
A letterhead is a heading at the top of a sheet of letter paper that usually consists of a name and an address, and a logo or corporate design, and sometimes a background pattern. Meanwhile, a letterhead template is a context of word refers to a sample of letterhead that has already some details in place that are replaceable.
Official correspondence will definitely use a letterhead or letterhead. Letterheads usually contain the logo, the name of the company, agency or institution, address, telephone number, and sometimes also the company’s official e-mail address or website and some even include the motto on their official letterhead.
How to Make a Letterhead with Letterhead Template?
In order to make a company or agency letterhead, you can follow the following methods. Here they are:
-
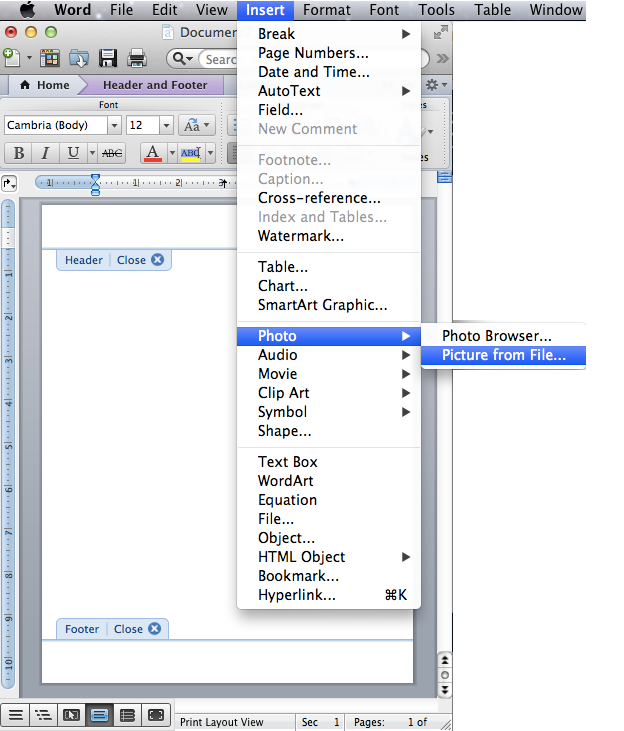
Step #1: Make sure the View Mode is in Print Layout
If not, you can make view mode a print layout by: selecting the View tab menu, selecting the print layout button. After the document is in Print layout view, double click on the header area at the top of the currently displayed document so that you are now in the Header Document editing process. If it is not there, put a check mark on the Different First Page option. This is to make the letterhead will only be on the first page, while the second page and so on do not use letterhead. Shift your left margin slightly to the centre. Estimate the width to be approximately enough for the logo you will add later
-
Step #2: Type the Organization Information
Type the name of your institution, agency, or company in the header. Also add a blank line to the last line. Also add a logo image of your agency. Don’t forget to make the layout format of the logo image “In Front of text”. Position the logo and agency text. Select and block the blank line that is on the last line to create a letterhead dividing line.
-
Step #3: Add a Border
To create a letterhead border, select the Home menu tab, then select the toolbar border button. From the popup menu options to create an existing border, select the item “Border and shading ..” at the bottom. In the Border and Shading Dialog, select Custom Settings, then select the thick and thin lines, then add them to the top of the paragraph. If you want the border line of the letterhead to be coloured other than black, for example red or blue, please just change the colour.
-
Step #4: Custom and Use
When the choices are correct, click the OK button. Your letterhead is almost ready. If the border is not aligned to the left, all you have to do is pull the left margin on the last line to the left.
After the Left Margin has been shifted to the left, the Letterhead is ready to use. Double click on the document area to close the Header View, or you can immediately click the Header and footer tools menu tab, then Design then select Close Header and Footer. Your document already has a letterhead ready for you to use. Don’t worry about the grey appearance, it shows that our Letterhead is in the document header area.
Now, after creating your own letterhead, you can start using it for some purposes. Indeed, the goal of the heading here is to help your letter to look formal and legal.